Can you believe Easter is just around the corner?!? Seriously, it is in less than a month! I hate how it goes back and forth from April to March. I disliked it even more when I was teaching. I'm sure some of you readers know exactly how I feel, you get to "Spring Break" and it's supposed to give you that close to the end of the year break, but then you realize that Spring Break falls early because of Easter(I find it funny that we get the week off due to Easter but it's not PC to say Easter break) and you still have 2 months left of school. Uhh whoa is me.
Moving on... a few of my friends and I get together for "Craft Night" on Tuesday nights, really its for eating and chatting, but every once in awhile someone will finish a craft. Last night I got started on an Easter Egg Wreath and finished it up this morning. I love wreaths! I try to make one for every holiday/time of year. So I decided that since I didn't have an Easter one, now would be the time to make one, if I was going to do it at all. I truly didn't want to waste a good Styrofoam wreath on eggs so I looked on Pinterest and found this lovely tutorial! (she actually refers her tutorial to couple others, but I used what she had) Kennedy Klan News & Honeybee Heaven I loved that she used cardboard instead of an actual wreath. So I had my inspiration and got to work!
Items Needed:
Cardboard (I would say 18"x18" or so)
Glue gun and lots of glue sticks
Eggs (I used two $2 packages from Target)
Easter grass (optional)
Ribbon
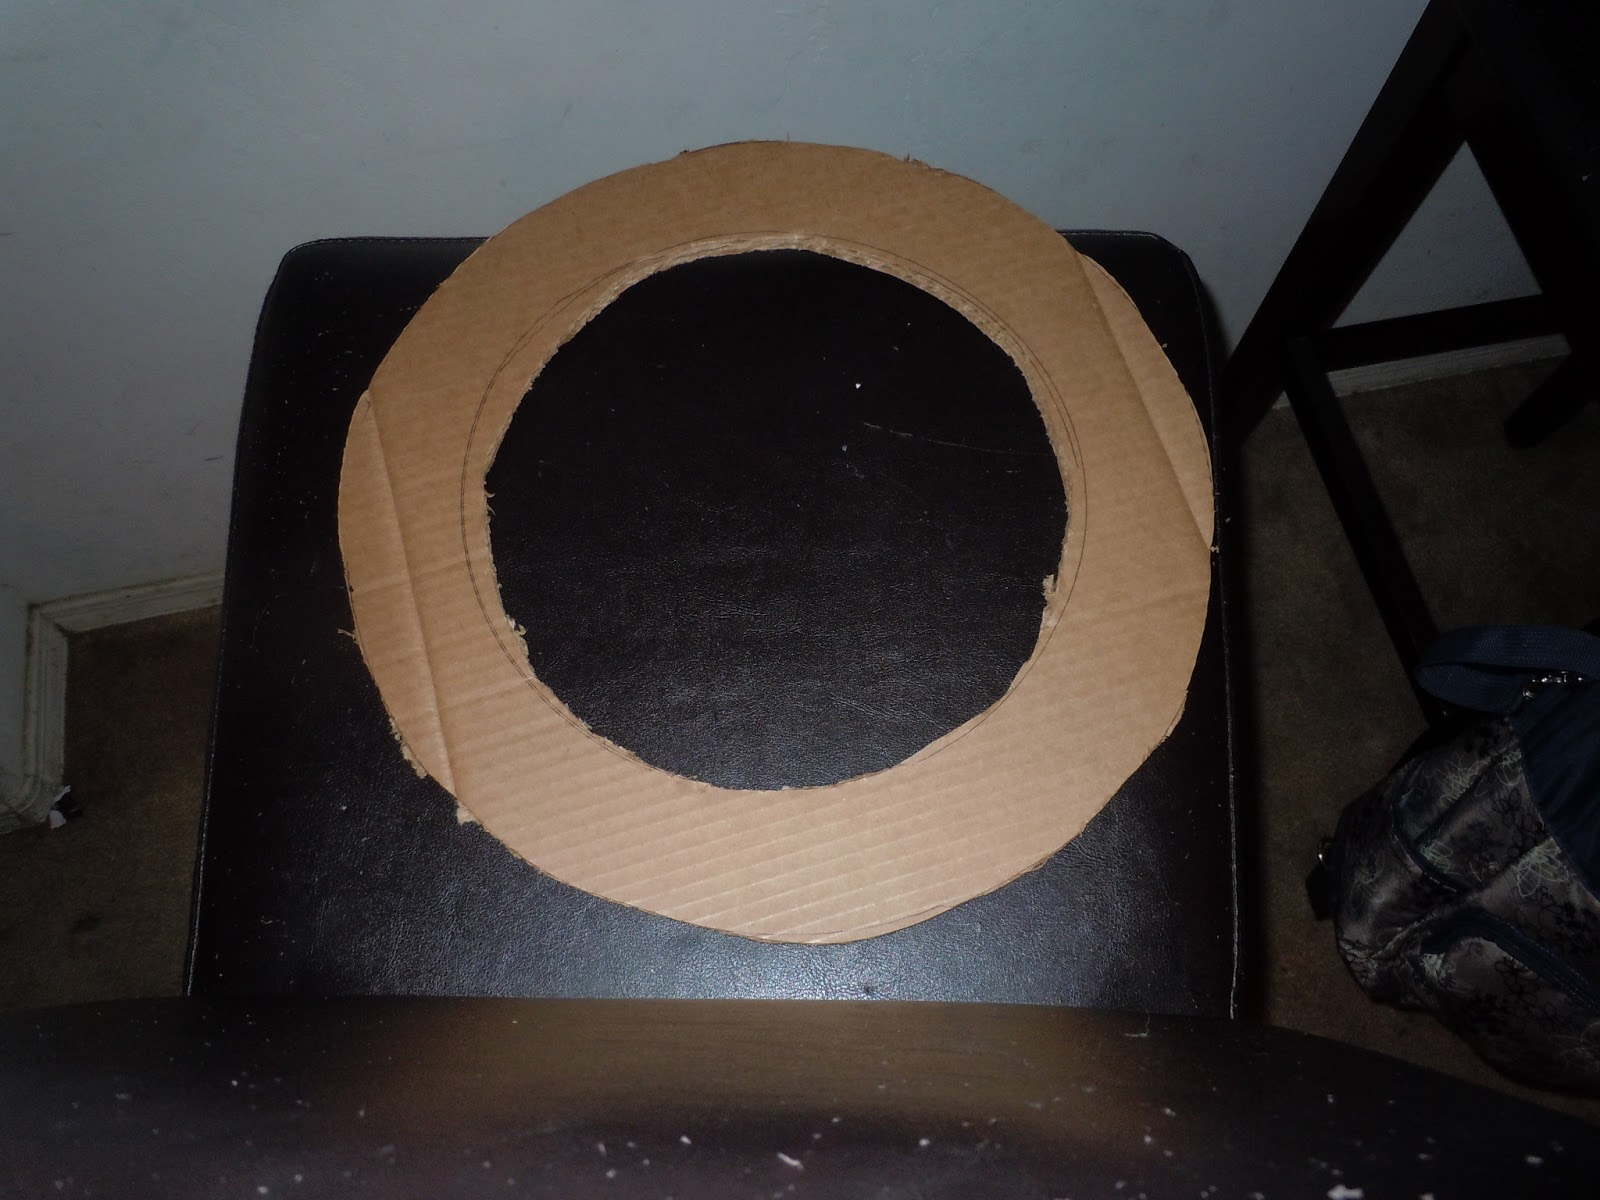
So I had a large piece of cardboard and I actually took a Styrofoam wreath I had and traced the outside and the inside. Then I cut it out using an exacto knife, please be careful on this step. The Hubs always yells at me when I use knives or saws ...well anything dangerous actually. I think he thinks I'm going to cut off a finger! I did work in the picture framing business for 5 years and nothing happened! I know how to operate these tools! Now I have a round piece of cardboard (clearly it doesn't have to be perfect! And as you can see I have a little bit of a fold in the cardboard, that's alright as long as it isn't a huge fold)

Next I took my eggs and just started gluing. I knew I was going to have two rows of eggs on the bottom layer and one on the top. I was not worried about the order I went in with the eggs. If you are more into patterns and such you could separate your eggs by color and do a patten, but I totally didn't care. So I went around once with eggs facing out of the wreath and then went around a second time with the inside layer with the eggs facing into the wreath. And apparently I don't know how to center my pictures!

Then I went and put a layer of eggs on top of the two rows.
Again, I didn't care about patterns or if colors were by the same colors.
Again, I didn't care about patterns or if colors were by the same colors.


 |
| It looked totally fine looking down on it this way, but when I picked it up I saw this... |
 |
| I did not like that you could see the cardboard so I went around again putting grass in between the bottom layer of eggs. |
 |
| I'm not big into bows so I just tied my ribbon into one and hung it on my screen door for everyone to see! I think it looks mighty nice! I'm sad it'll only be up for a month, but there's always next year! |


No comments:
Post a Comment